
Installation of Electricity
JuBo Padel supplies the best fixtures for padel. However, our installers are not authorized electricians and therefore cannot/may not carry out any electrical work.
JuBo Padel are also open to if the customer chooses another fixture, not supplied by JuBo Padel,
We've compiled some information below about electrical installations, in response to questions we've received over time.

It is important to calculate the cost of connecting the lighting and also the connection with the software we have chosen to control the lighting.
Some customers ask us if we can't do it, but unfortunately, here in Sweden, a qualified electrician has to do fixed installations. It is this authorized electrician who is responsible for the connection and if something happens, he is the one responsible (hence the requirement for authorization).
What our installation team does (if you order the lighting from us) is to attach the fixture to the light post. In cases where you want to put the lighting on rails, the electrician will do this.
Cable Work - new facility
Normally, cable ducts are poured into the foundation. This eliminates all visible cabling. At the bottom of the page, you will find a pdf that shows the exact measurements of where the center of the lighting pole goes, so that the pipes come up in the right place. Keep in mind that the construction is bolted with 160mm long anchor bolts, so do not lay cabling that interferes/affects this.
Cable Work - existing facility
If you are going to build padel courts in an existing premises, there is no option to cast the pipes into the floor. Then two solutions remain; to connect the lighting from the ceiling or run the cabling outside the structure. Here we describe the two different ways:
Illumination connected from "the roof"
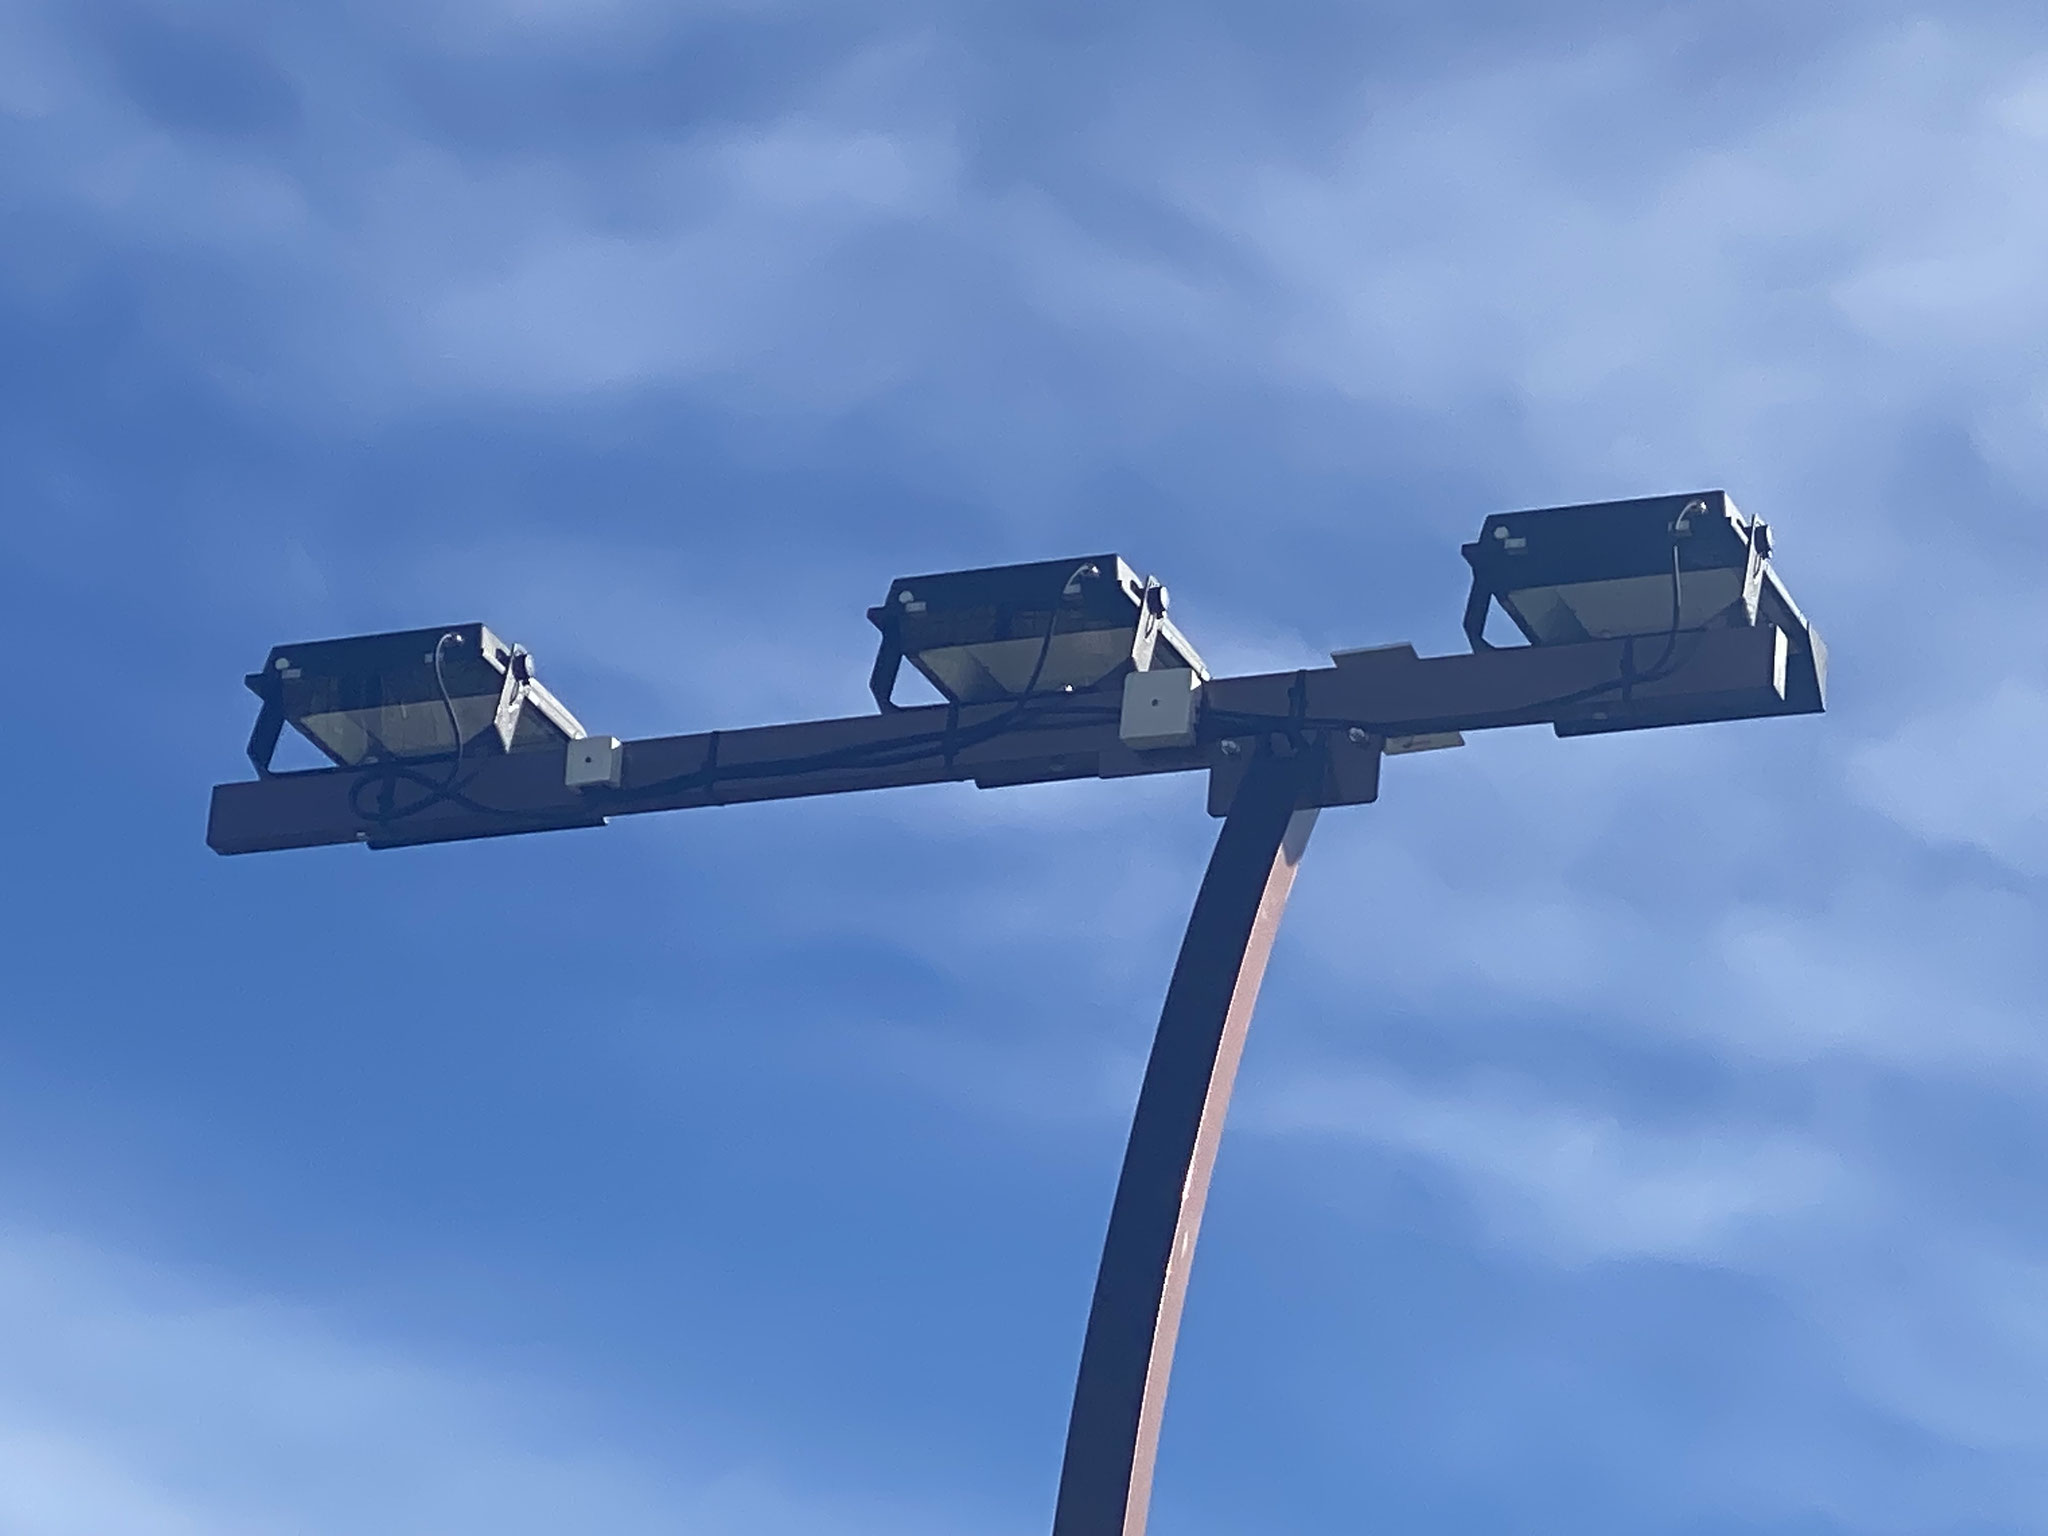
If you choose to put the luminaire on lighting poles, these are normally 6 meters and you can then run the cable from the respective lighting pole up to the ceiling and then on to the next pole. You can also choose to put the fixtures on rails, which should be hung in line with the construction of the track (to avoid shadows). You can then distribute the luminaires evenly along the side (e.g. every 4 metres) to get an even light flow.
Illumination connected from "the floor"
If you do not choose to run the cables through/via the roof, then it remains to run them on the outside of the structure. Either in cable channels attached to the outside (note: not up on the structure when it is in play if the ball bounces there) or our courts are made so that you can run the cables inside the structure.
Cable Work Illumination
All work with electricity connection need to be carried out applying to the local restrictions and recommendations. Our installers will not do any cable work, but can help you with (if you ask for it before we raise the construction, when that has been done we can not help you) connecting the illumination to the crossbar (80cm width as standard, optional upp to 200cm).
These instructions below are based on the Vision & Panoramic models and with illumination installed on a columns of illumination and that the electricity comes up in the columns.
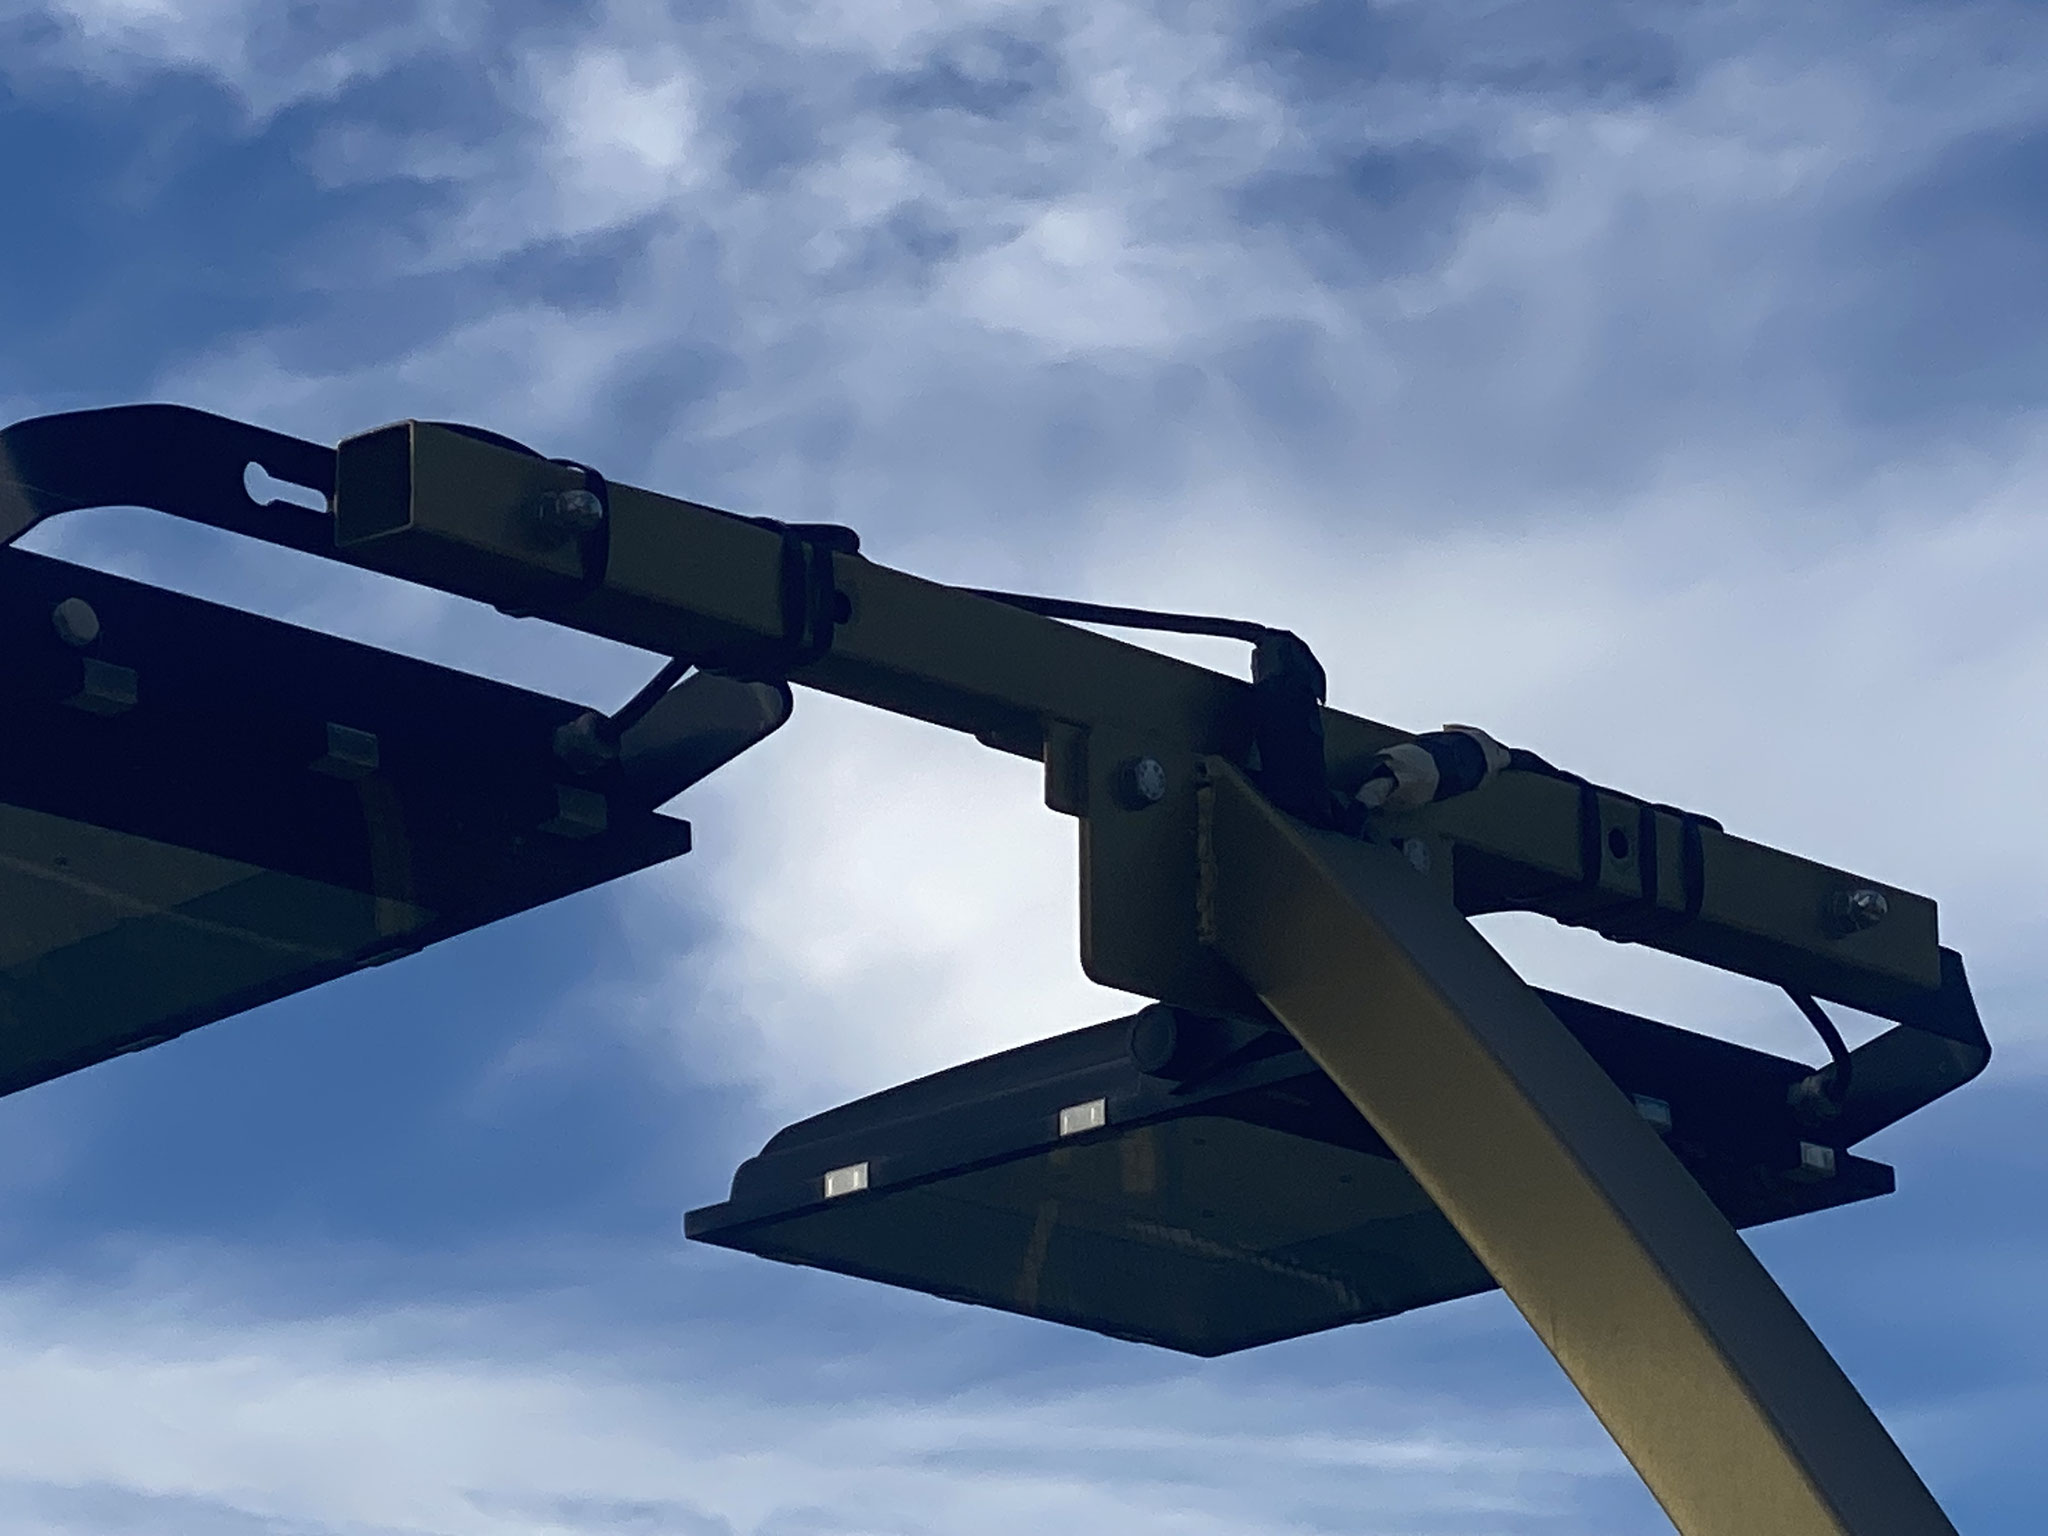
How to connect the illumination at the top of the column
If the supplier can provide the illumination with a 7m cable that is the best way. If not the cable from the illumination need to be connected to the electricity cable (than can be installed/comes from inside the column that measures 80x80x2mm). This connection need to be IP65 if it's an outdoor installation. The illumination can be attached to the 800mm long crossbar (dimensions 40x40x2mm).


How to connect the cable from illumination to the electricity
The electricity cable that comes from the ground, up in the column (that measures 80x80x2mm). At apprx 800mm from the anchorplate there is a hatch where the cable can be connected to the cable coming from the illumination.
Please notice on the photos....
- That some of the crossbars are 200 cm (optional).
- The size some of the columns at the photos are 80x120x2mm due to the fact that the columns are curved (not possible to produce curved columns in 80x80x2mm).